Introduction
Poor artwork preparation is the number one cause of printing delays, unexpected results, and customer disappointment. Whether you’re ordering custom t-shirts, vinyl stickers, embroidery, or laser engraving in Calgary, submitting print-ready artwork ensures your project looks professional, arrives on time, and matches your expectations.
At DTG Printing Corp in Calgary, we’ve seen thousands of design files over 28 years—and we know exactly what works and what doesn’t. This comprehensive guide will teach you how to prepare artwork for custom printing, covering file formats, resolution requirements, color modes, and printing method-specific guidelines.
General Artwork Preparation Guidelines
File Formats
Vector Files (Preferred):
- AI (Adobe Illustrator)
- EPS (Encapsulated PostScript)
- PDF (Portable Document Format)
- SVG (Scalable Vector Graphics)
Why Vector? Vector files scale infinitely without losing quality, making them ideal for any size print.
Raster Files (Acceptable):
- PNG (Portable Network Graphics)
- JPG/JPEG (Joint Photographic Experts Group)
- TIFF (Tagged Image File Format)
Minimum Resolution: 300 DPI at actual print size.
Avoid: Low-resolution images from websites, social media screenshots, or images stretched beyond their original size.
Need design help? Check our graphic design services.
Resolution Requirements
Minimum Resolution: 300 DPI (dots per inch) at actual print size.
Why 300 DPI? Lower resolution results in blurry, pixelated prints. Higher resolution ensures sharp, professional results.
How to Check Resolution:
- Open your image in Photoshop or image editing software
- Check image size at 100% scale
- Ensure dimensions match your desired print size at 300 DPI
Common Mistake: Using 72 DPI web images for printing. These look fine on screens but print poorly.
Color Modes
CMYK (Cyan, Magenta, Yellow, Black):
- Standard for printing
- Ensures accurate color reproduction
- Convert RGB designs to CMYK before printing
RGB (Red, Green, Blue):
- Standard for screens and digital display
- Colors may shift when printed
- Always convert to CMYK for printing
Pantone/Spot Colors:
- Specific color matching system
- Ideal for brand consistency
- Provide Pantone numbers for exact matching
Common Mistake: Designing in RGB and expecting exact color match when printed.
Bleed and Safe Zones
Bleed: Extra design area extending beyond the cut line (typically 1/8″ or 3mm).
Why Bleed Matters: Ensures no white edges if cutting is slightly off.
Safe Zone: Area inside the cut line where important elements should stay (typically 1/8″ from edge).
Why Safe Zone Matters: Prevents text or logos from being cut off.
Printing Method-Specific Guidelines
DTG & DTF Printing Artwork Requirements
Best File Types: PNG with transparent background, high-resolution JPG, vector files (AI, EPS, PDF).
Resolution: 300 DPI minimum at actual print size.
Color Mode: RGB or CMYK both work; we convert as needed.
Design Considerations:
- Avoid extremely fine lines (under 1pt)
- High contrast designs print best
- White underbase automatically added for dark garments
- Full-color designs welcome
Common Sizes:
- Front chest: 12″x12″ maximum
- Full front: 12″x16″ maximum
- Full back: 12″x16″ maximum
Learn more about DTG printing and DTF printing.
Embroidery Artwork Requirements
Best File Types: Vector files (AI, EPS, PDF) strongly preferred.
Resolution: 300 DPI minimum for raster files.
Design Considerations:
- Simple, bold designs work best
- Avoid extremely fine details (under 3mm)
- Limit colors to 6-8 for cost efficiency
- Minimum text height: 6mm (about 0.25″)
- Avoid thin, decorative fonts
Digitization: We convert your artwork into embroidery files (.DST format).
Common Sizes:
- Left chest logo: 3-4 inches wide
- Hat front: 2-3 inches wide
- Full back: 10-12 inches wide maximum
Learn more about embroidery services.
Laser Engraving Artwork Requirements
Best File Types: Vector files (AI, EPS, PDF, SVG) strongly preferred.
Resolution: 300 DPI minimum for raster files.
Color Mode: Black and white or grayscale (laser engraving doesn’t use color).
Design Considerations:
- High contrast designs engrave best
- Avoid extremely fine details (under 0.5mm)
- Bold, clear designs recommended
- Minimum text size varies by material (6-10pt)
Material-Specific Tips:
- Wood: Lighter woods show higher contrast
- Metal: Anodized aluminum produces white marks
- Acrylic: Creates frosted white appearance
- Leather: Darkens when engraved
Learn more about laser engraving.
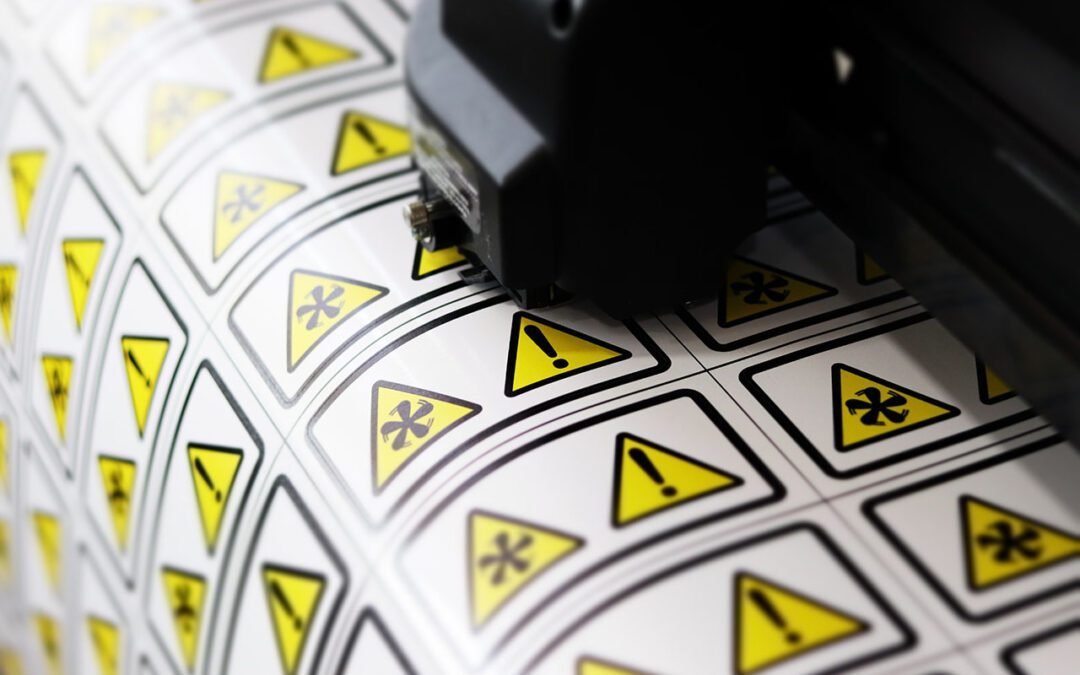
Vinyl Sticker Printing Artwork Requirements
Best File Types: Vector files (AI, EPS, PDF) for die-cut stickers; high-resolution PNG or JPG acceptable.
Resolution: 300 DPI minimum.
Color Mode: CMYK for accurate color reproduction.
Design Considerations:
- Include 1/8″ bleed for edge-to-edge designs
- Keep text/logos 1/8″ from cut line (safe zone)
- Bold outlines work best for die-cut shapes
- Avoid extremely thin elements that may be fragile
Finish Options: Glossy (vibrant, reflective) or Matte (subtle, sophisticated).
Learn more about sticker printing.
Common Artwork Mistakes to Avoid
Low-Resolution Images: Using 72 DPI web images results in blurry prints. Always use 300 DPI.
Wrong Color Mode: Designing in RGB can cause color shifts. Convert to CMYK for printing.
No Bleed: Designs without bleed may have white edges. Always include 1/8″ bleed.
Text Too Close to Edge: Text in the cut zone may be trimmed. Keep text in the safe zone.
Stretched Images: Enlarging small images causes pixelation. Use high-resolution originals.
Complex Embroidery Designs: Extremely detailed designs don’t translate well to embroidery. Simplify for best results.
Thin Die-Cut Elements: Fragile sticker elements may break. Use bold outlines.
How to Submit Artwork
Step 1: Prepare Your Files
Ensure your artwork meets the guidelines for your chosen printing method (resolution, format, color mode, bleed).
Step 2: Name Your Files Clearly
Use descriptive filenames (e.g., “BandLogo_FrontChest_12x12.ai”).
Step 3: Submit Your Order
Visit https://dtgprinting.ca/submit-your-order/ and upload your design files with specifications (print size, garment type, quantity, printing method).
Step 4: Review Proof
We’ll provide a proof for your approval before production begins.
Step 5: Approve & Print
Once approved, we’ll begin production with confidence your artwork is print-ready.
Need Design Help?
Don’t have print-ready artwork? No problem! Our graphic design services can help you create professional designs optimized for your chosen printing method.
Why Choose DTG Printing Corp for Custom Printing in Calgary?
28 Years of Experience: We know what makes great print-ready artwork.
Pre-Production Review: We check all files before printing to catch potential issues.
Design Services Available: Need help? We offer professional graphic design.
Multiple Printing Methods: DTG, DTF, embroidery, laser engraving, stickers—all under one roof.
Local Calgary Service: Fast turnaround, local pickup, personalized consultation.
Get Started with Custom Printing in Calgary Today
Ready to create custom printed products with professional results? Submit your print-ready artwork or contact us for design assistance.
Contact DTG Printing Corp:
- Website: https://dtgprinting.ca
- Submit Order: https://dtgprinting.ca/submit-your-order/
- Pricing: https://dtgprinting.ca/pricing/
- Contact Us: https://dtgprinting.ca/contact-us/